

How to create silhouettes you can recolour
Often in a document you need a visual way to represent people. Most of the time an icon is fine – usually a head-and-shoulders blob. Or you might choose a full-body icon (although that runs the risk of looking like the sign for the toilets).
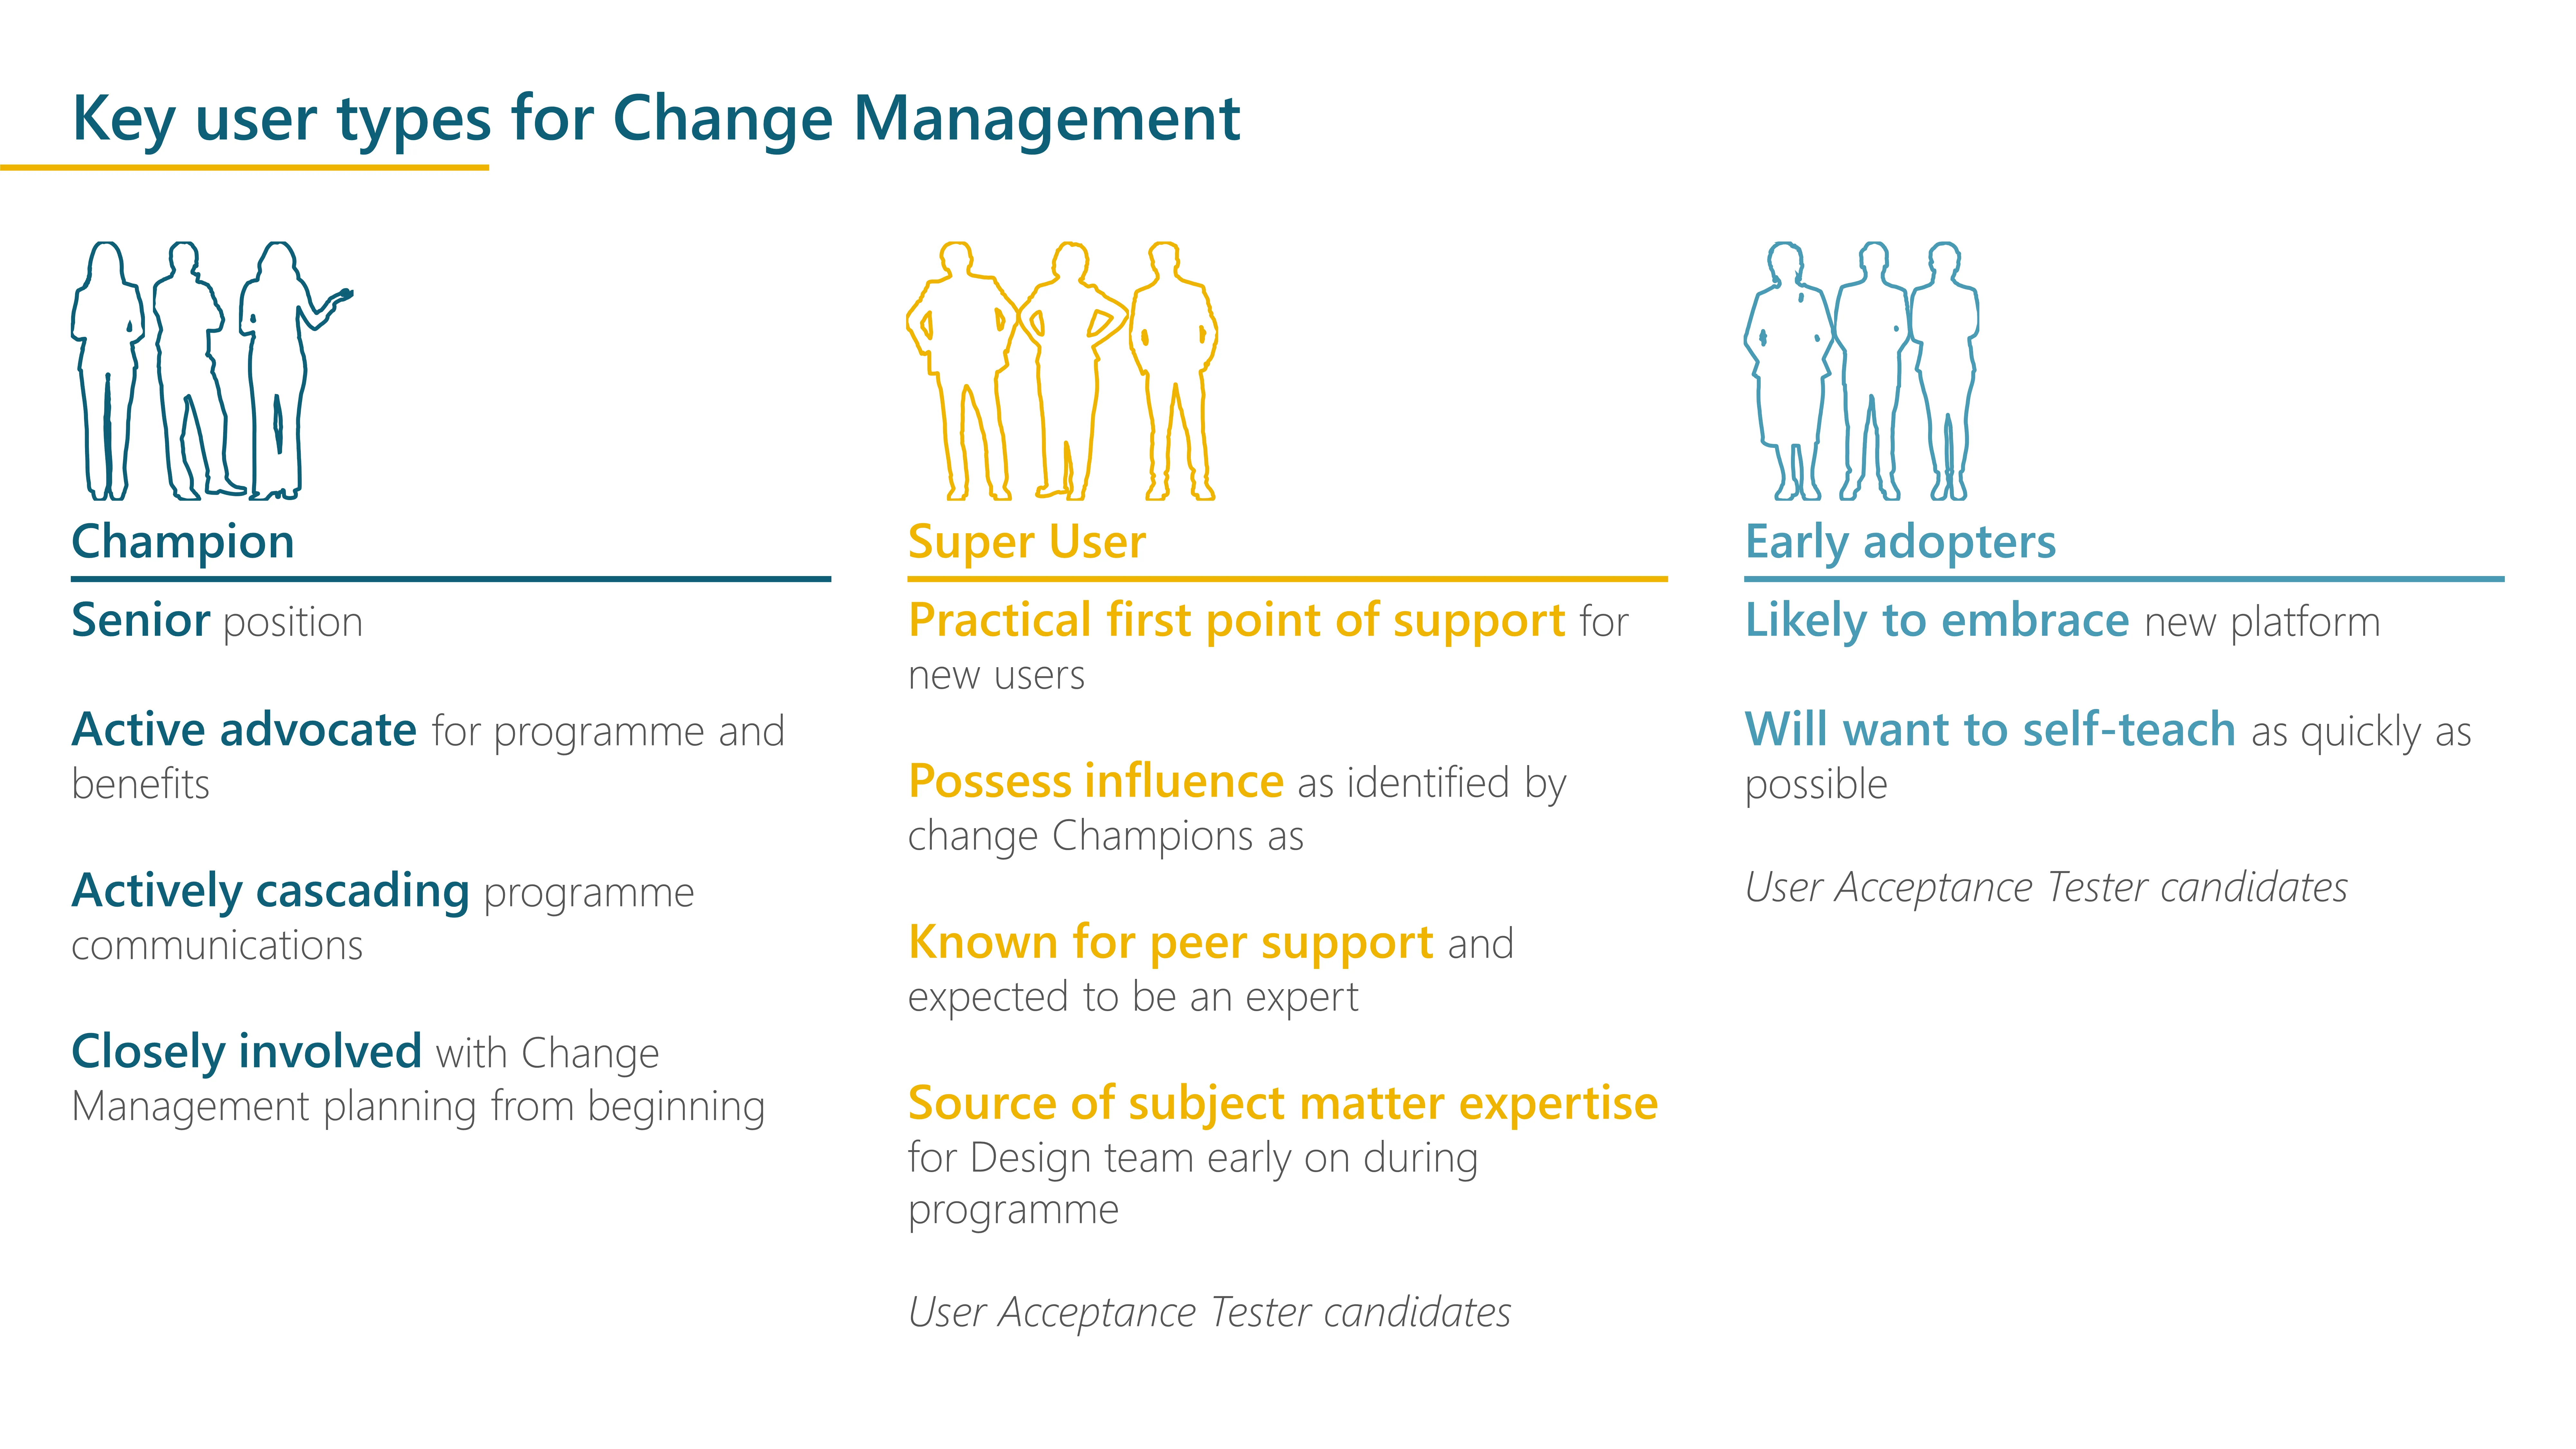
A more ‘human’ approach is to use silhouettes. Your readers will instantly see that the shape is a person, without having to process all the visual information contained in face, body and clothing. Take a look at the example below.

We haven’t been able to find a good source of free, realistic silhouette SVGs. So we transform photos into SVGs using the process below. PowerPoint can only turn a photo black, so to get access to more colours we use a simple, free external tool.
Where can I find cut-out photos?
The trick to using a photo to create a silhouette is that it has to be a cut-out. In other words: with a transparent background. The good news is that there are hundreds of these available right inside PowerPoint with their stock cut-outs. They’ve recently increased this resource to 34 models in dozens of poses - see this article.
If you want to use other photos, such as team photos, then use remove.bg to quickly get rid of the background. Our article about creating better headshots walks you through that.
Steps to create a silhouette

This is exactly the same process for turning a PNG icon into an SVG. Start with a cut-out photo.
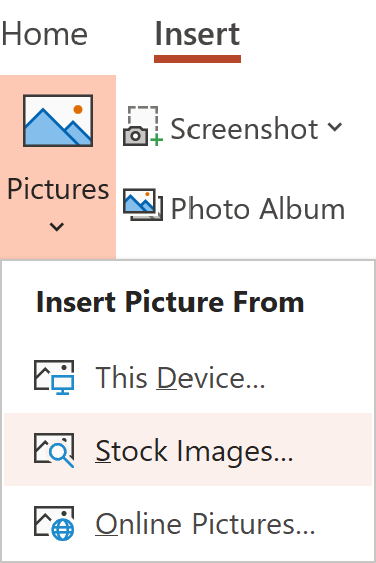
Insert>Pictures >Stock Images and choose Cutouts.
1. Turn it black
We start by creating a literal silhouette: a completely black version of the photo:
Picture Format > Corrections > Picture Correction Options… (at the bottom)
Move the Brightness slider to -100%. The image should turn black. If that doesn’t work, there may have already been some image tuning. Press the Reset button and try again. You may also need to press the Reset button in the Recolour section.
2. Save the picture as a file
Now you need to extract the image from PowerPoint. Important: the size of the image in PowerPoint directly impacts the resolution when you save it – and the higher the resolution, the more detail your SVG will have.
Make the black silhouette at least as tall as the slide itself
Right-click and Save as Picture…
Check that Save as Type is set to PNG
Save the file somewhere
3. Convert to SVG
We use Convertio for this, the results are usually pretty good.
Go to Convertio
Add the file you just saved
For the ‘to’ dropdown select Vector and then SVG
Click Convert, wait and then download your new file
4. Add the SVG to your slide
Simply drag your downloaded SVG file to your slide and colour it how you like.
For a lighter effect, you could just set the outline colour and fill it with white.

Other ways to use this technique
Partial silhouettes
You can play around with the original image to leave some details of the photo. Instead of touching the brightness, turn the contrast up to 100 and the saturation down to 0. Now try adjust the brightness up and down in small amounts and see what works for the photo in question.

Note: this technique may not work that well on dark skin, so be sensitive to that.
Headshots
Sometimes just a head-and-shoulders will be enough. You can crop an SVG in the same way as a photo, so no need to crop the photo first.

Groups of people
If you want to talk about a team or group of people, you could assemble some silhouettes into an overlapping crowd. You could stick to solid colour...

...or try a little transparency:

Increasing the detail
The amount of detail that comes back in the SVG depends on the resolution of the PNG file. That in turn depends on how large it is on your slide when you save the black version.
All you need to do to get a really detailed version is to zoom out of your slide and enlarge the image so it is 4 or 5 times taller than the slide. (You can undo this once you finish saving it). Then proceed to save the image in as in Step 2.
You may need a little trial-and-error to find what works for you.
Want more tips like this in your inbox?
It's useful*
It doesn't flood your inbox (monthly-ish).


